
There are a few reasons to want to do this, either a hard drive upgrade, a new shiny ps5 replacing the ps4 or perhaps the dreaded blue light of death, whatever your reason it is possible…
The PS4 uses a 2.5″ disk drive that can be removed from the console and used as an external drive, by mounting the hard drive into an external drive enclosure that can connect to your computer via your preferred interface.
In this article, we will explain the basic steps to turn that old PS4 drive into a functioning external drive for your computer…
Contents
How to remove the Hard Drive from a PS4
In this guide, we are going to outline the procedure for removing the hard drive from a PS4 and using it as an external drive. We wont cover the neccassary steps to upgrade the hard drive in the PS4 itself.
First things first we need to remove the hard drive from the PS4. This step requires a small phillips screw driver. We highly reccomend this computer repair toolkit from IFIXIT for all your computer repair needs, however for a cheaper option consider this computer multi tool.
1. IMPORTANT! Power off the PS4 and disconnect from the mains power supply.
2. Slide open the casing to reveal the hard drive slot.
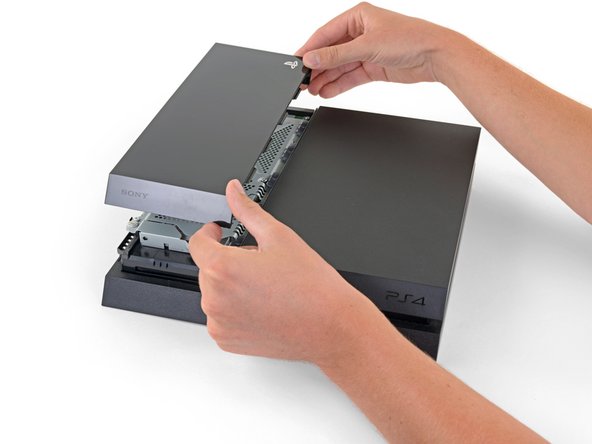
3. Remove the screw for the hard drive bracket.

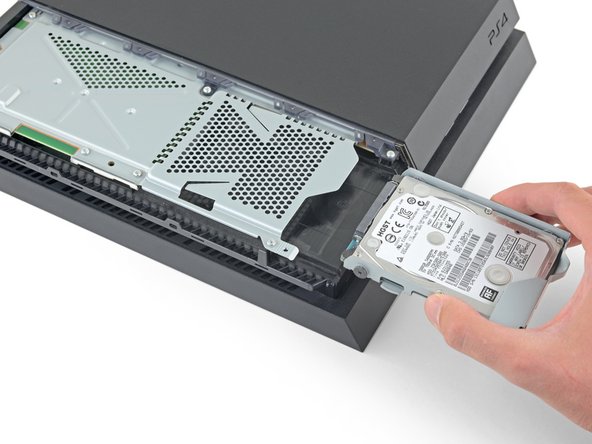
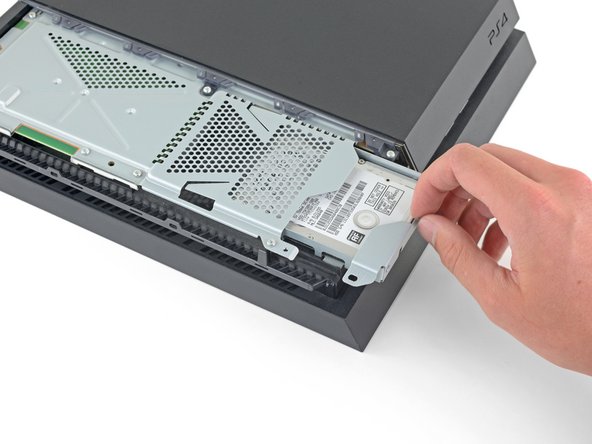
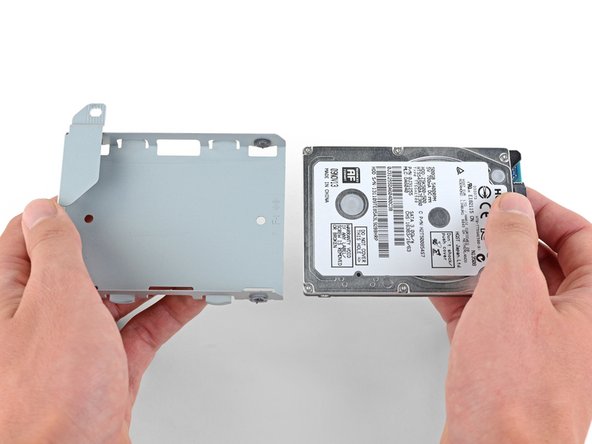
4. Pull the hard drive enclosure from the casing like so,
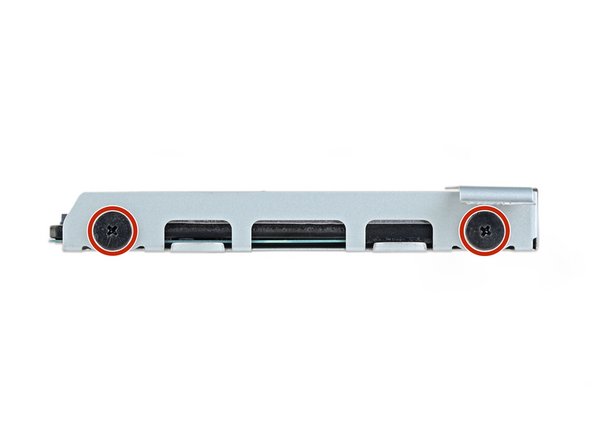
5. Unmount the hard drive by removing mounting screws,
6. Remove the hard drive from the tray.
How to Mount the PS4 HDD into an External Drive Enclosure.
Once you have successfully removed the HDD from your PS4 you will need to insert it into an External drive enclosure. This is a relatively easy step and all depends on what enclosure you have. There are a lot of options and most of them are a ‘No-Tool’ solution making it a very easy process.
Choosing the right external enclosure for a PS4 Drive.
There are a couple of things to consider at this point. Firstly you will need to make sure you purchase a 2.5″ external drive enclosure to ensure compatibility. Secondly, you will need to consider what interface your computer uses and purchase an enclosure that uses the same interface, for example, USB 3.0, USB-C, or FireWire to name a few.
You may also want to consider a SATA to USB interface which does the same job as an enclosure but allows you to be able to swap the adapter between drives easier if the drive is not intended for constant use.
Once you have established that then you know exactly what type of drive you are looking for. We have linked to a few of our recommendations below to make things even easier.
How to format a PS4 Hard Drive for use as an external drive.
PS4 drives will require formatting to operate as external hard drives for storing data. To make the drive usable you will need to format it to meet your system requirements for your operating system. Below are the steps for both Windows and MacOS.
On Windows, the steps are as follows.
- Press the Windows key or start button.
- Type ‘Disk Management’ and press enter.
- Connect the drive to your PC.
- Right-click on the drive specified as unknown
- Select initialize drive
- Select the partition style:
Master Boot Record (MBR) for hard drive smaller than 2TB.
GUID Partition Table (GPT) for hard drive larger than 2TB. - Click ok.
- The disk will now show with unallocated space.
- Right-click the unallocated space and select ‘New Simple Volume’
- Leave values as default and click next
- Choose a letter or leave as default and click next
- Choose preferred format file system, (recommend NFTS)
- Choose Allocation unit size ”Default’
- Choose Volume Name (whatever you like, e.g. ‘My Drive’)
- Uncheck the quick format option (to force full format)
- Uncheck enable file and format option.
- Click next
- When complete click finish.
Your drive is now ready to go!
For MAC follow these steps.
- Click on Finder>Applications>Utilities.
- Select Disk Utility from the list.
- Select your external drive from the Disk Utility interface.
- Click the Erase button at the top.
- A pop-up box will appear
- Change the name of your hard drive
- Choose the format of the disk.
- Alter the scheme of the disk
Master Boot Record (MBR) for hard drive smaller than 2TB.
GUID Partition Table (GPT) for hard drive larger than 2TB. - Click Erase.
- Disk utility will start the format process.
You now have a fully functioning External hard drive for your MAC!